In this tutorial, we will show you how to integrate your Leo Rover with the Freedom Robotics platform.
In this tutorial, we will show you how to integrate your Leo Rover with the Freedom Robotics platform.
Freedom's Pilot teleoperation enables extremely low latency (50-200ms round trip) and fully customizable control of your robot – from real-time driving to triggering missions to custom commands for manipulation and navigation.
All in an intuitive-to-use interface designed for tablets, phones, and desktops in the real world, where you need to be able to drop your interface, pick it up, and continue on.
Source: freedomrobotics.ai
You can use it together with stock Leo Rover UI with only simple steps needed to integrate.
This way, you'll be able to connect to the rover via the Internet from anywhere you want. Together with remote driving functionality, Freedom Robotics allows for data streaming, 3D-mapping visualization, GPS data overlay on the map, and much more.
See more: https://www.freedomrobotics.ai/
After following the tutorial You'll have the ability to control the Leo Rover and gather data from anywhere in the world using Freedom Robotics GUI.

You can choose either free trial, paid plan or use any dedicated discount code.
Connect to Leo Rover via SSH and connect the robot to the Internet.
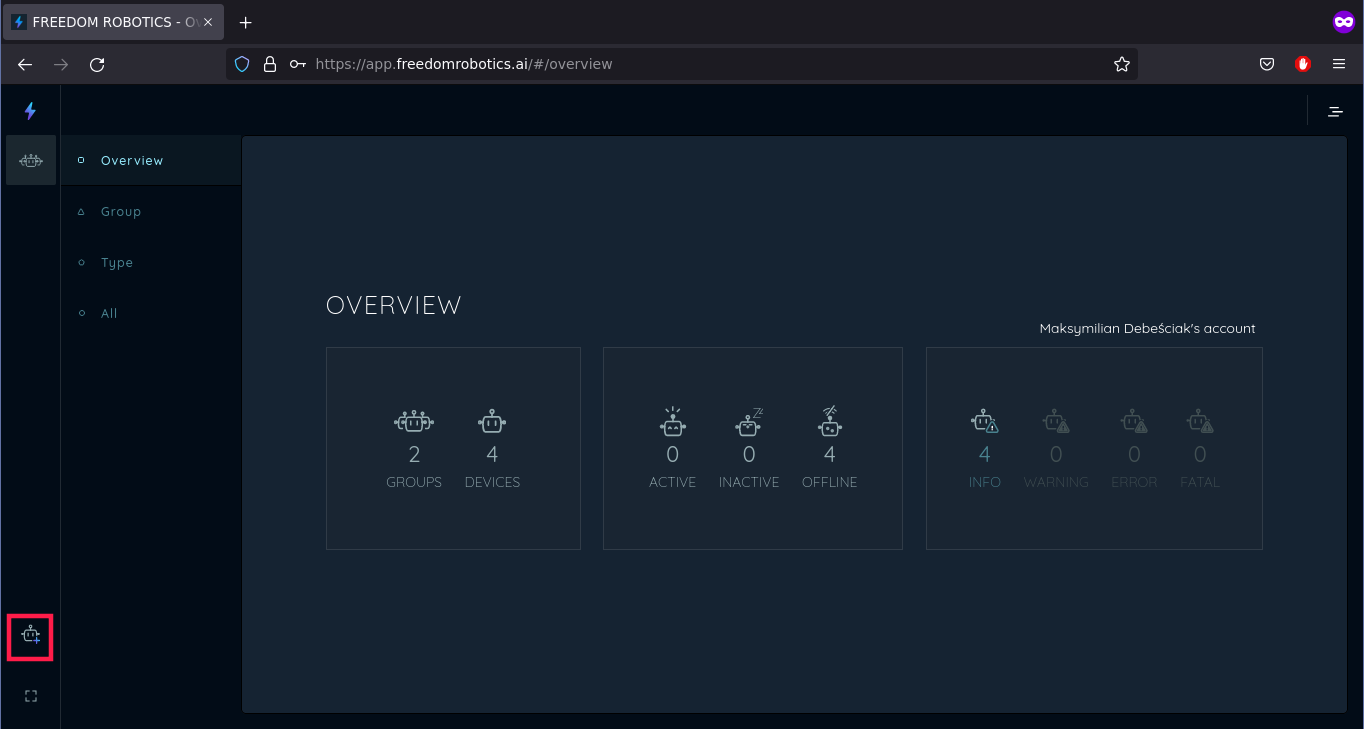
After logging in, you should see the main menu with an overview of your robots.
Start by clicking the Add Device button, located in the bottom left corner of the screen.
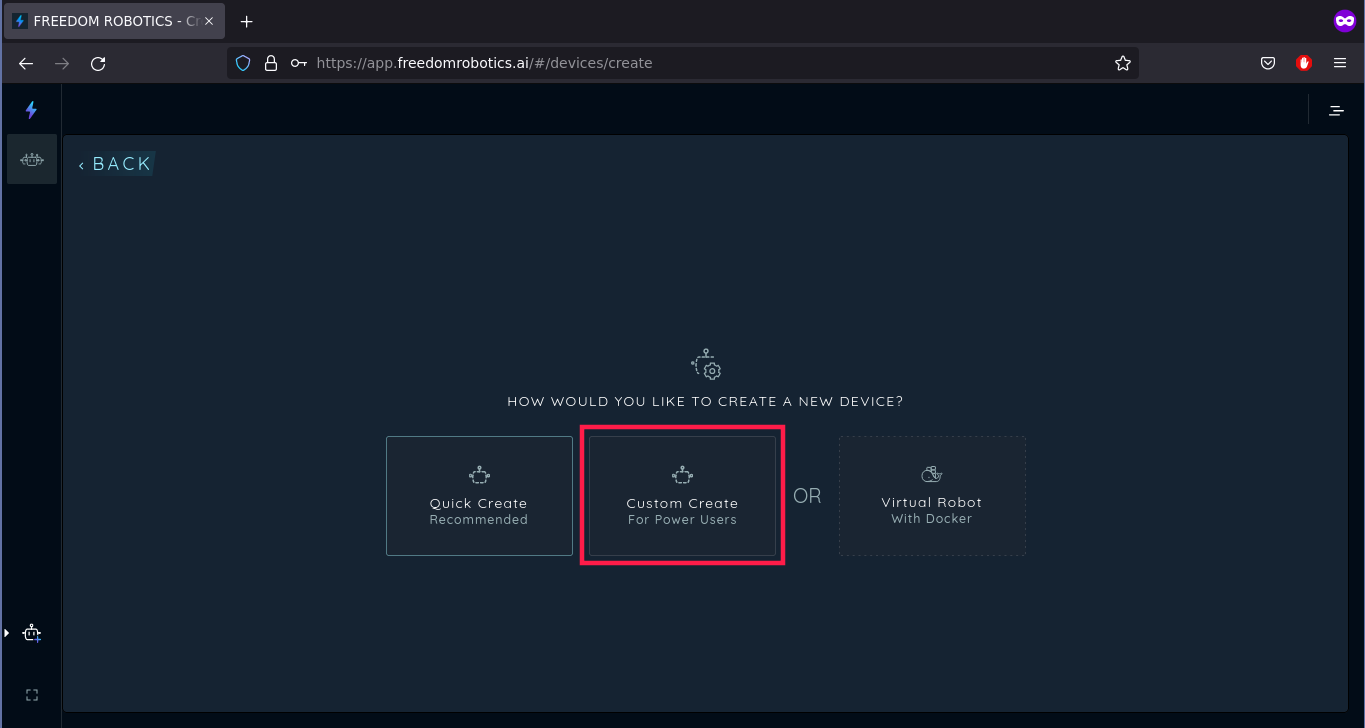
Then, you can choose whether you want to customize your robot, or get a quick installation with some base settings. We will choose the Custom Create option.
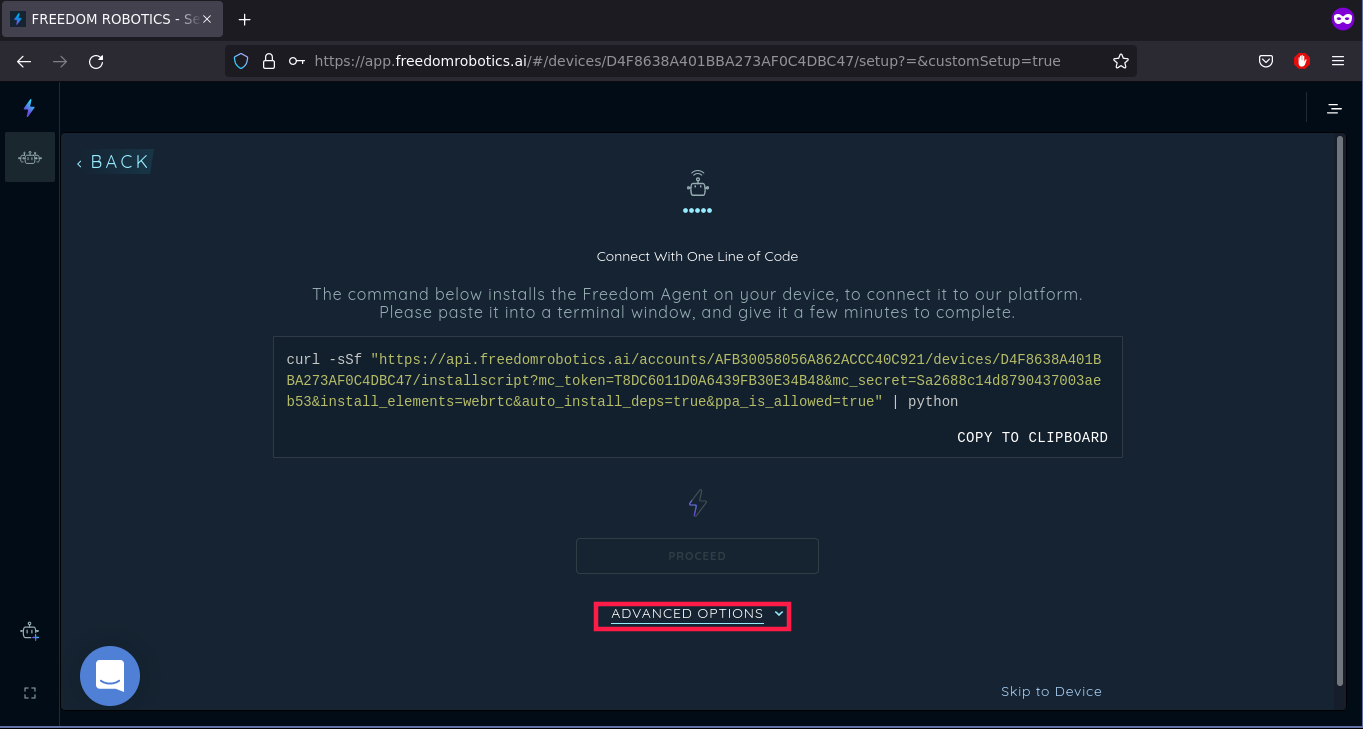
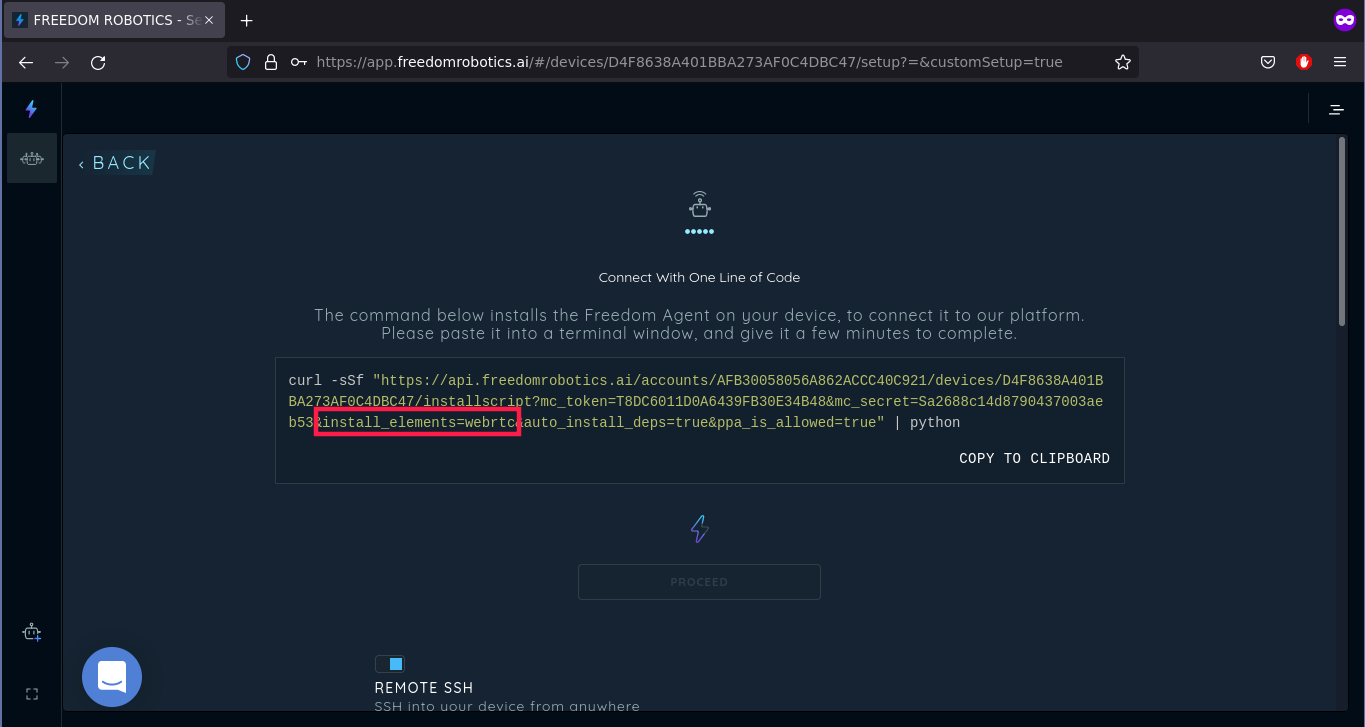
No matter what option you chose, the next step is the same. After a short time, we get a custom curl command that will install the Freedom Robotics agent when executed on our rover.
We will run this command in the Leo Rover console, but first, we need to make sure that some things will get installed. To do so, click the Advanced Settings button.
There, look for REMOTE SSH and WEB RTC settings and make sure both are checked.
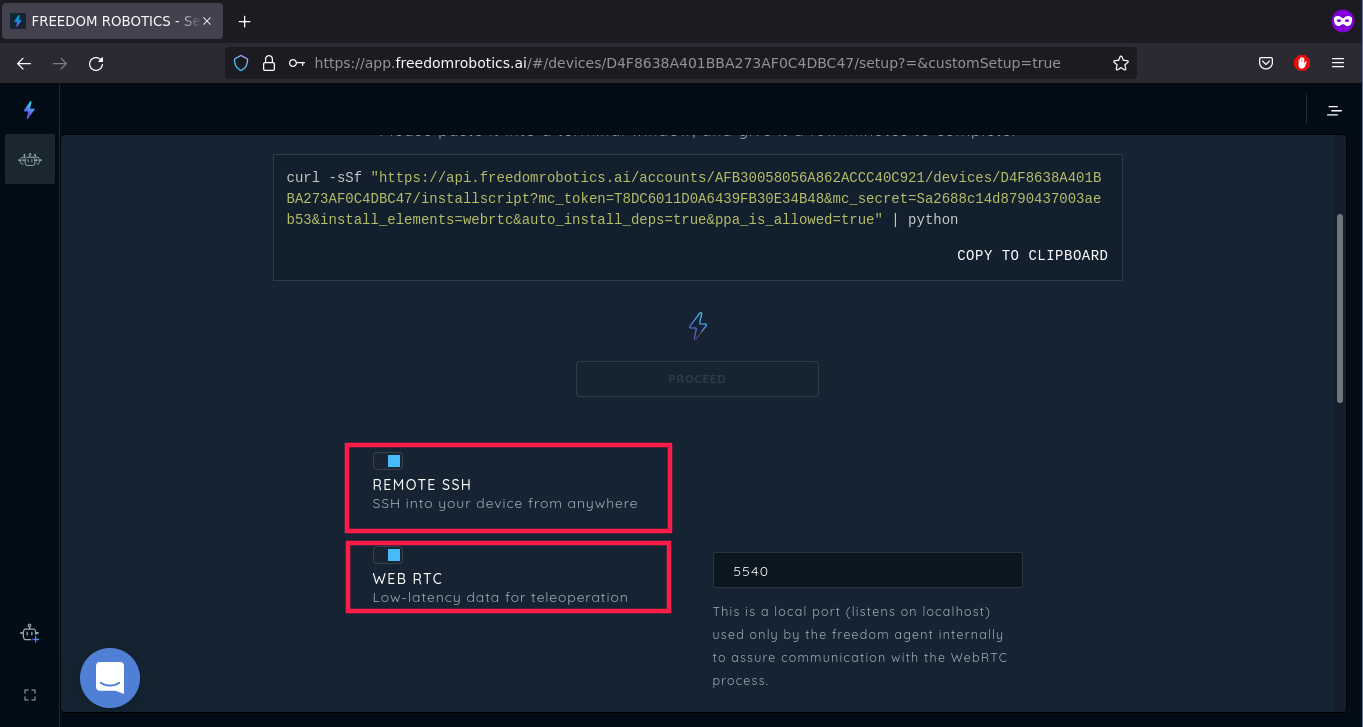
You can also see if there is install_elements=webrtc fragment in the generated command.
Next, you have to run the generated curl command in the LeoRover console. To do so, you have to connect to Leo Rover via ssh, and the robot needs to have an internet connection. If Your Leo Rover is running ROS Noetic change "python" at the end of the copied command to "python3". If You do not remember what ROS Distro Your rover is using, check it with:
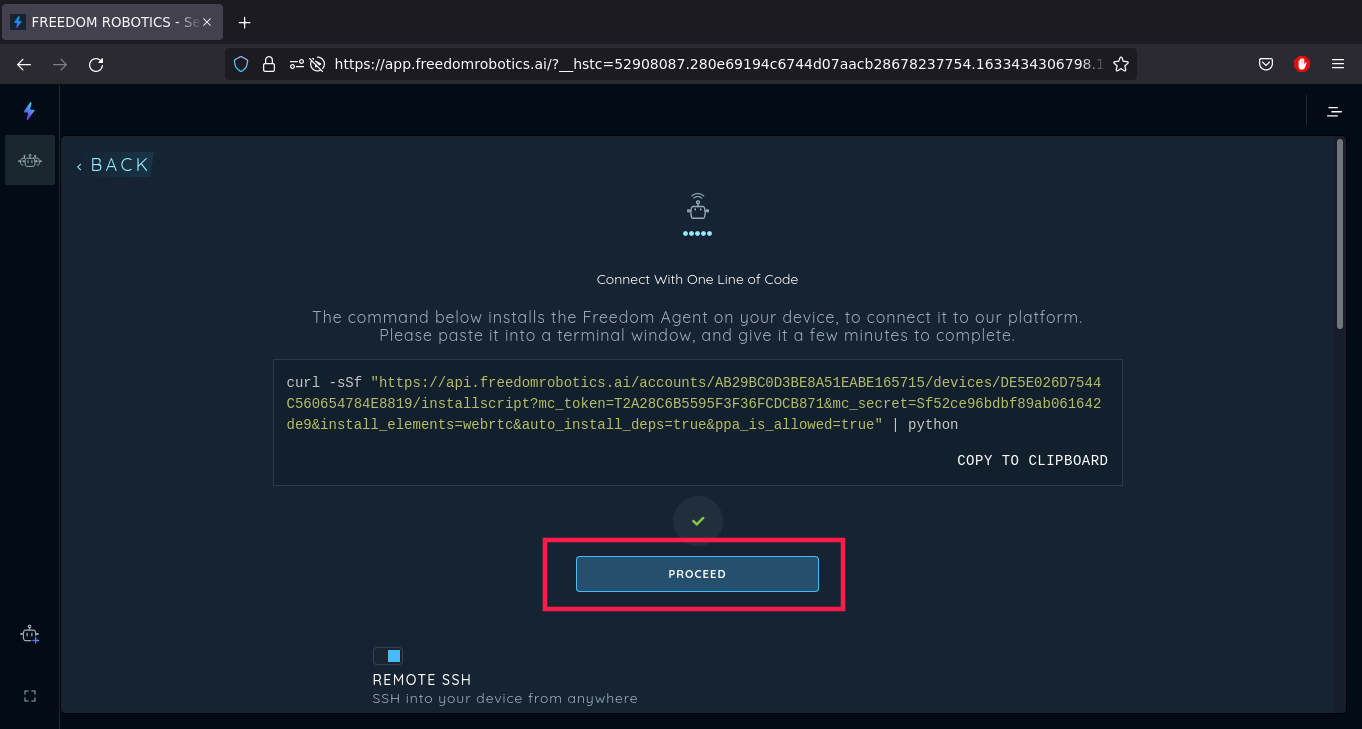
Then, just copy-paste the command and press Enter. The installation of the Freedom Robotics agent will start and you will be asked for the password. Type in the password (default: raspberry) and continue the installation.
When the installation is complete, the service is installed and will start with every boot of the system. You can close the ssh connection (press ctrl + d) and go back to Freedom Robotics.
Now, the PROCEED button should be active (if you didn't notice, it was inactive before the installation). Click it.
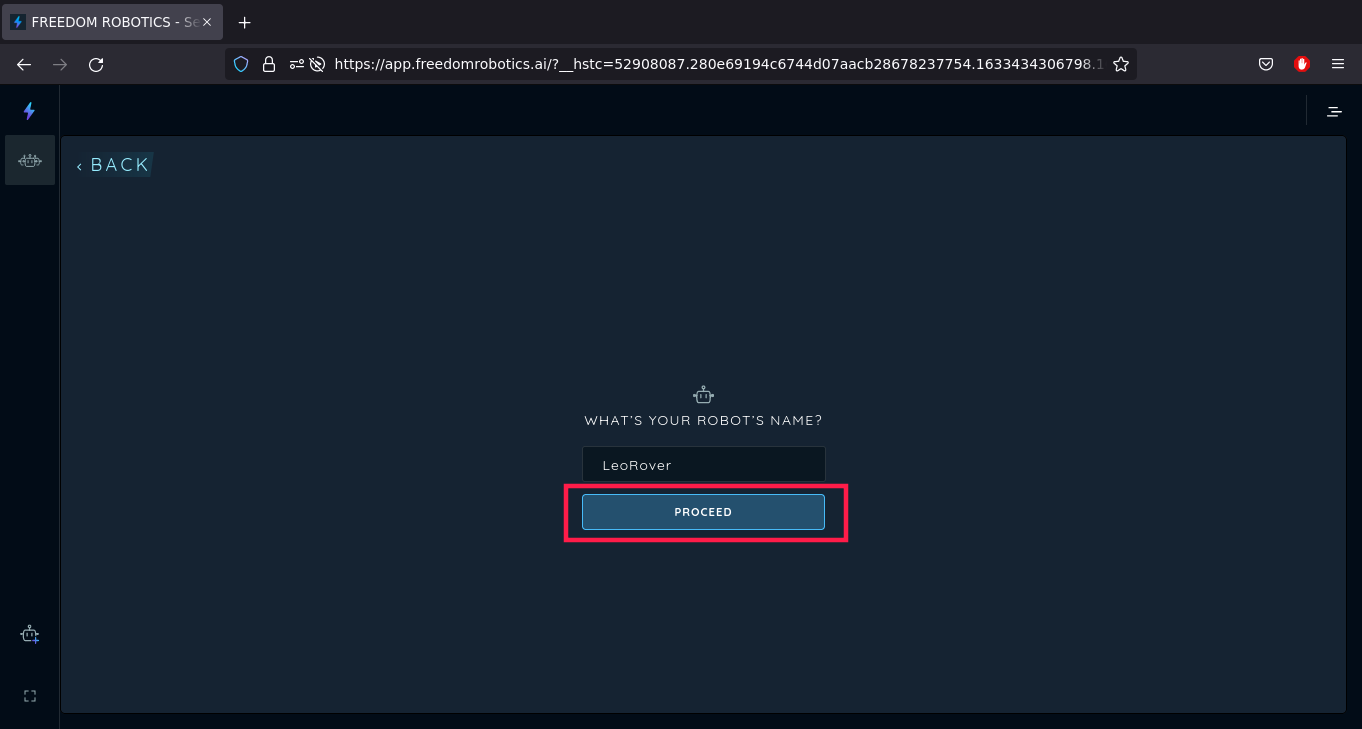
Now, you will be asked for your robot's name. It can be anything you want, we will continue with LeoRover. Enter your robot's name and click the PROCEED button.
Now, you have to choose the robot's type. If this is your first robot, it's better to chose from the drop-down list New Type, and fully configure your robot. You can also choose any preset if you have already configured any robot before – settings will be added automatically.
If you choose New Type, you will be asked for the type's name. Same as with the robot's name, you can choose anything you want. We will continue with LeoRobot. To continue, press PROCEED.

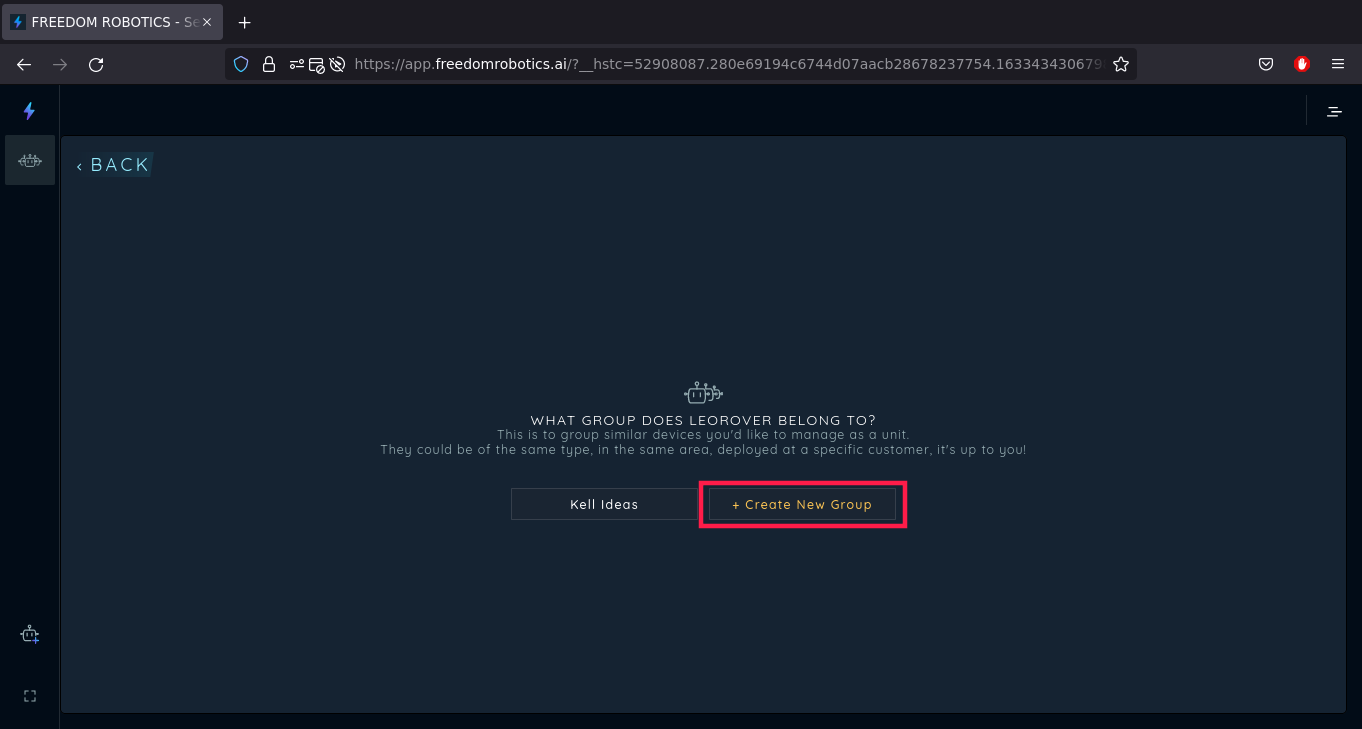
The next step is to choose a group for your robot. The purpose of grouping is to have devices that will be managed as a unit (e.g. they have the same type, are in the same area, or are deployed for a specific customer) in one group. You can choose from already existing groups (if you have added any before), or Create New Group. We will go with the second option and create a LeoRovers group.
When you provide the group's name, confirm it with Enter and customization will continue.
From now on begins the customization of topics for your Freedom Robotics agent. The steps will be skipped if you have chosen the Quick Create option in the beginning.
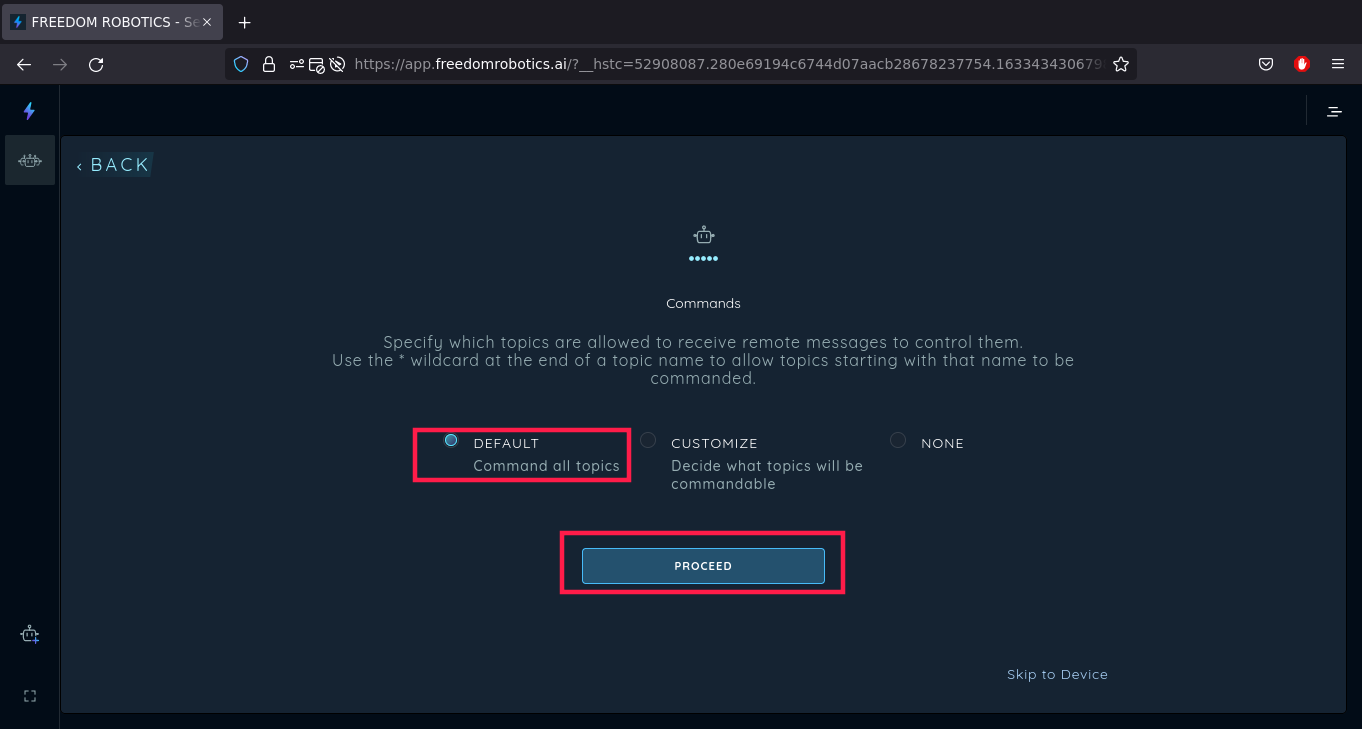
The first step is to configure what topics will be allowed to receive commands from Freedom Robotics. This is useful if you want to add commands for buttons on the joystick (e.g make a photo when pressing the square button), or if you want to pilot the robot using the UI joystick in Freedom Robotics. You have 3 options:
We will choose the DEFAULT option and continue by clicking PROCEED.
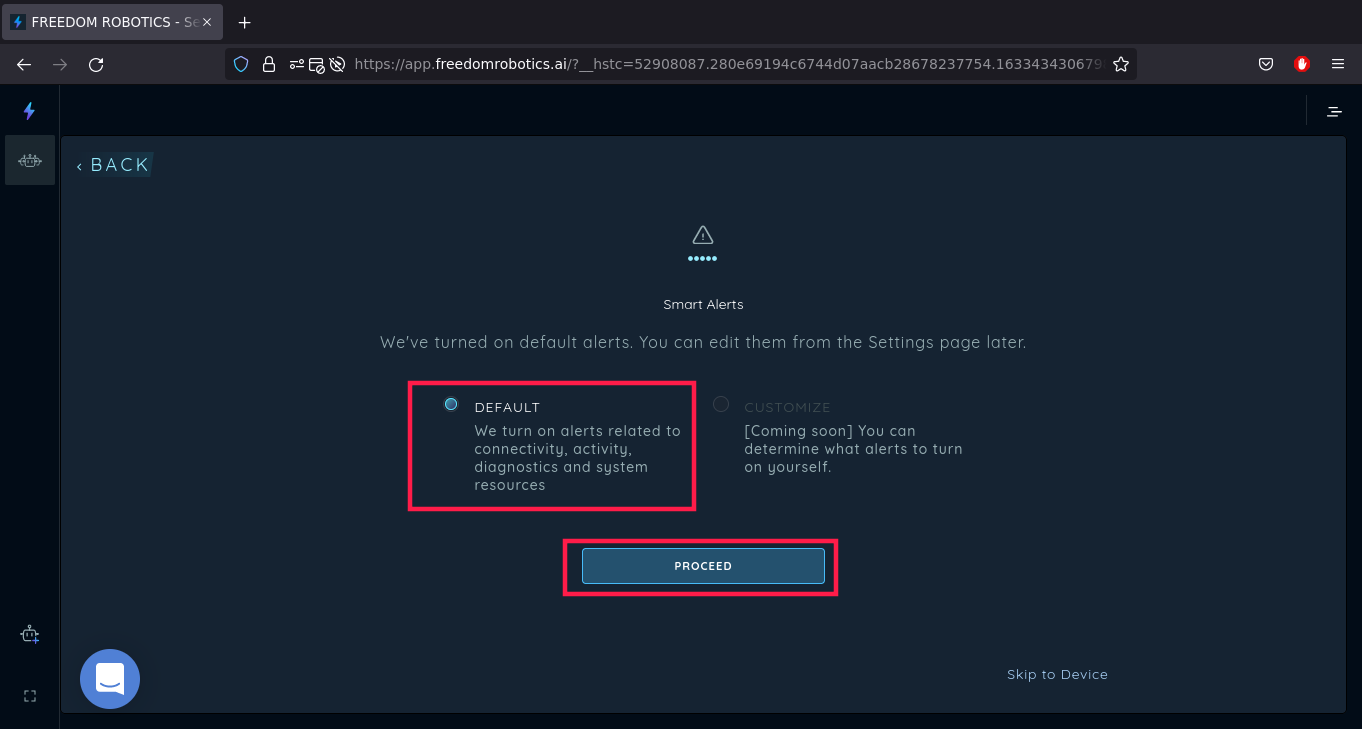
Then comes customization of the Smart Alerts. At the time of writing this tutorial, the customization is not possible and you can choose only the DEFAULT option.
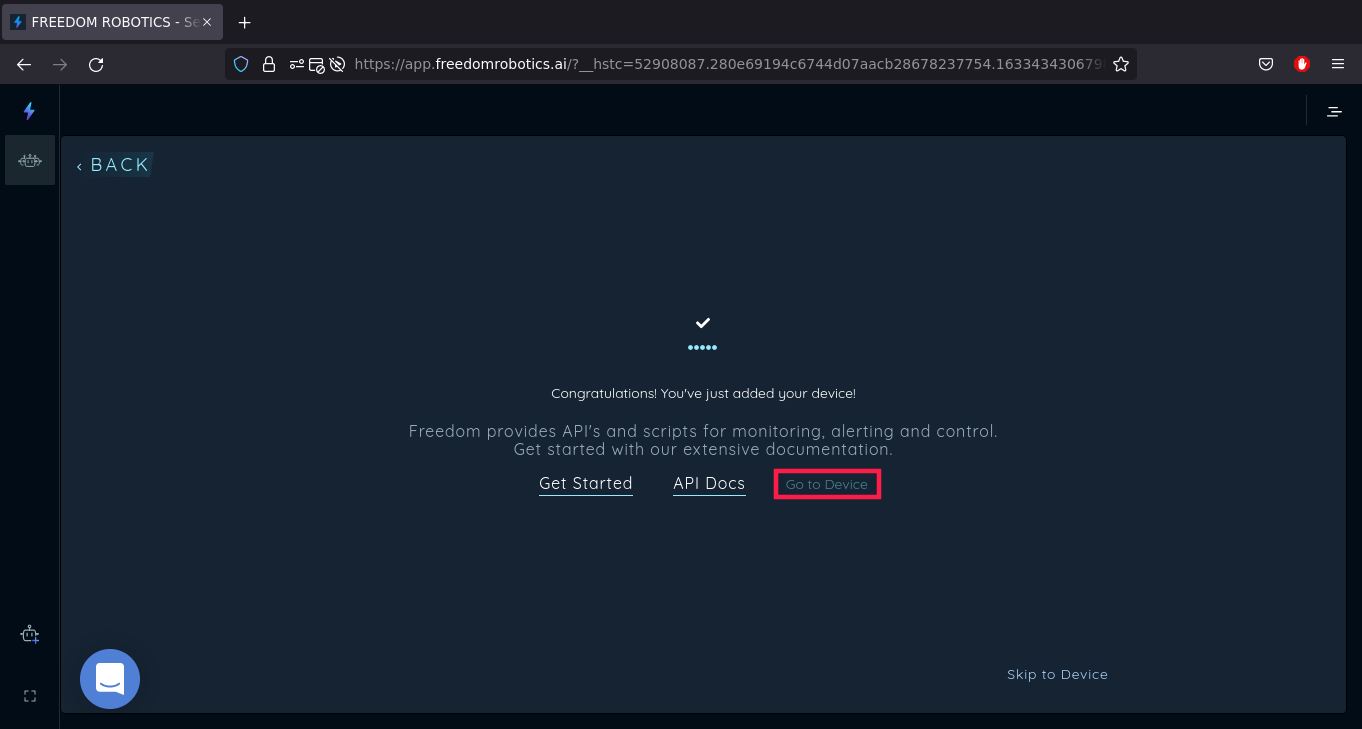
After this step, adding a new device ends. But we haven't yet configured topics that will be visible in the Freedom Robotics; therefore, we click Go To Device.
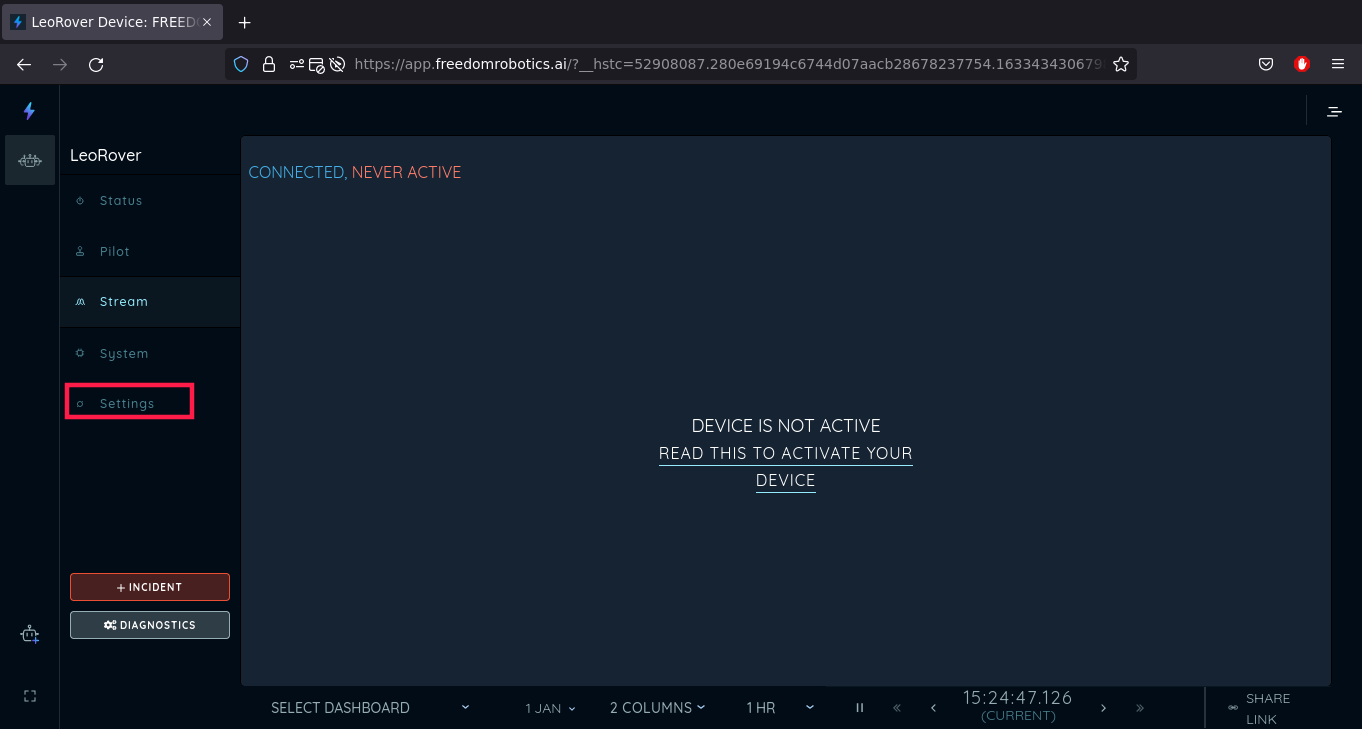
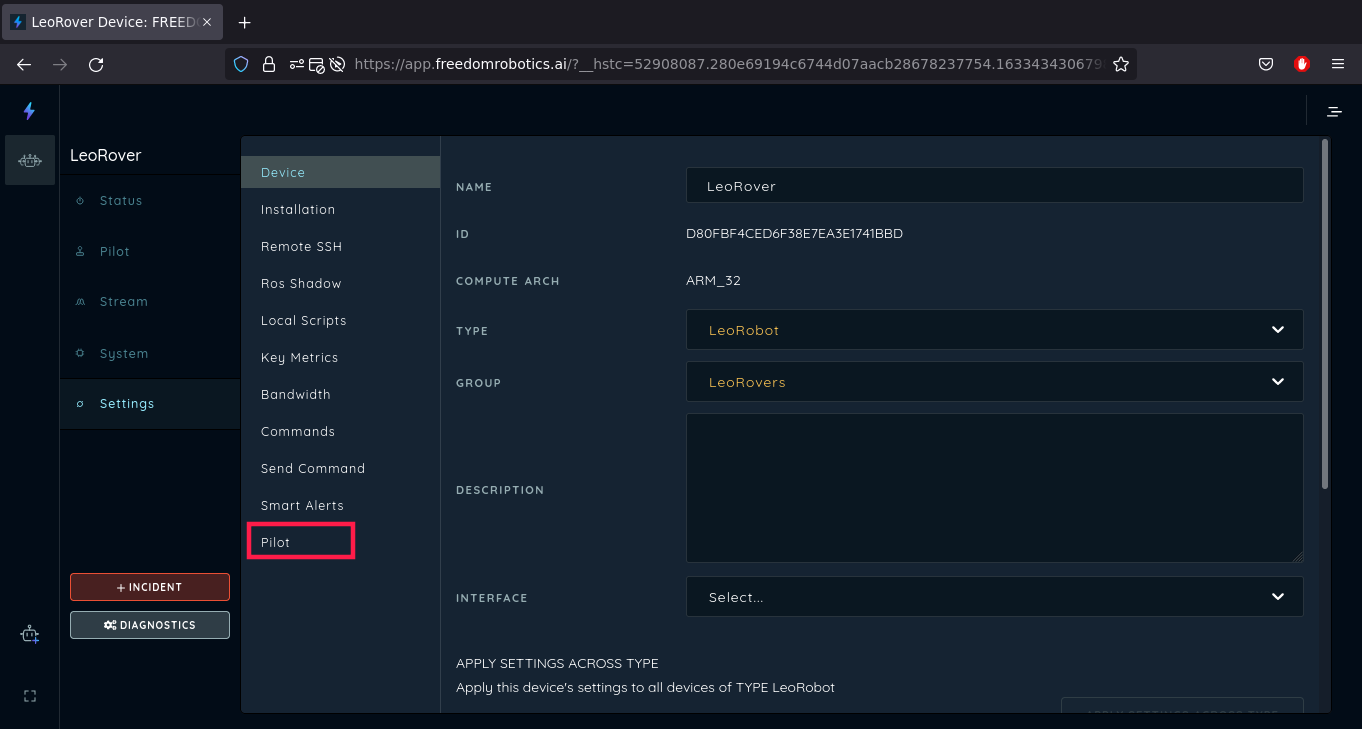
Now we see that the device is connected, although not active even though our rover is still turned on. That's because Freedom Robotics doesn't get any info from any topics from the robot. After the configuration, the robot will be visible as active. So now, from the robot's menu, we go to Settings.
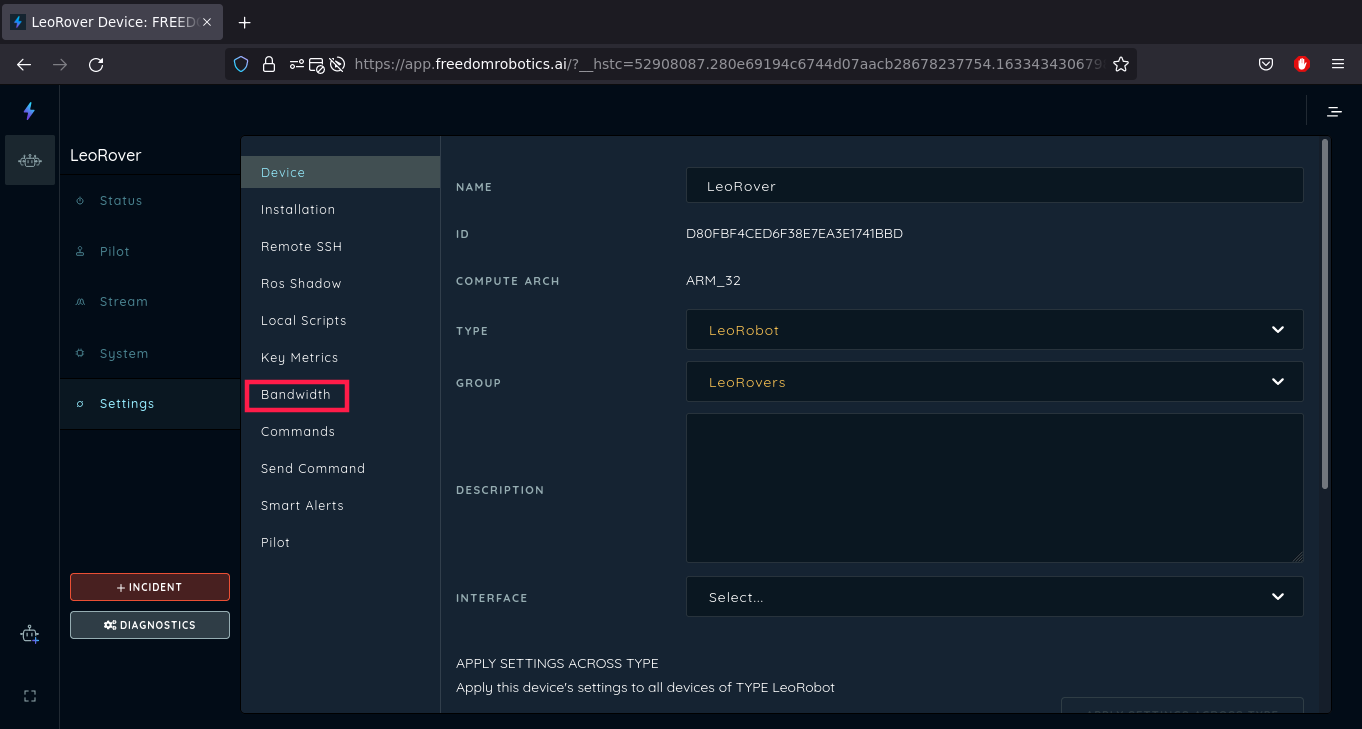
In this section, you can actually change the things that we have configured earlier (name, type group, etc.) or even delete the device from the account.
We want to customize topics, so we will go to the Bandwidth section.
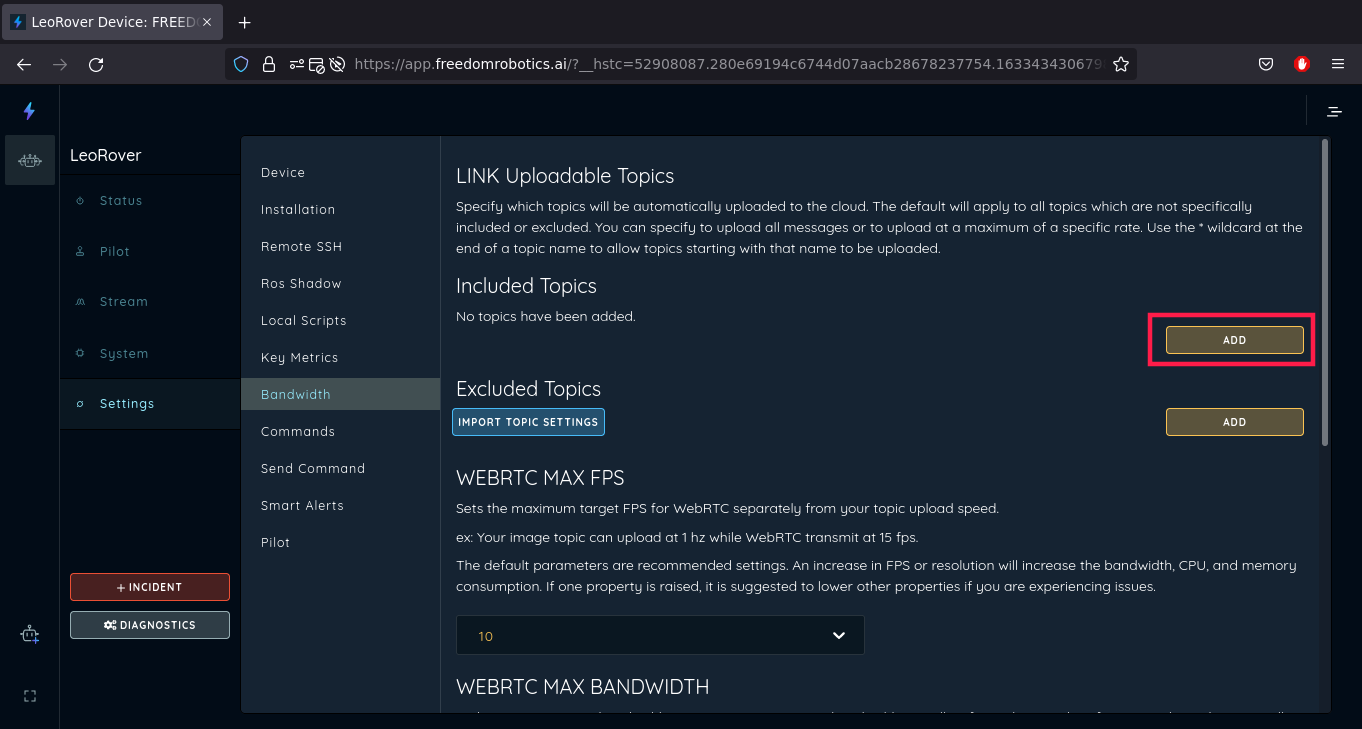
Here, you can see all the topics (ROS topics) that are monitored by the interface. If you have chosen the Quick Create option, the platform listens to all the topics running on the rover (/* entry in Included Topics). It's better to exclude the ones that are not needed, so if you have it, please delete the /* entry.
Now, we will add the topics that are specific to Leo Rover.
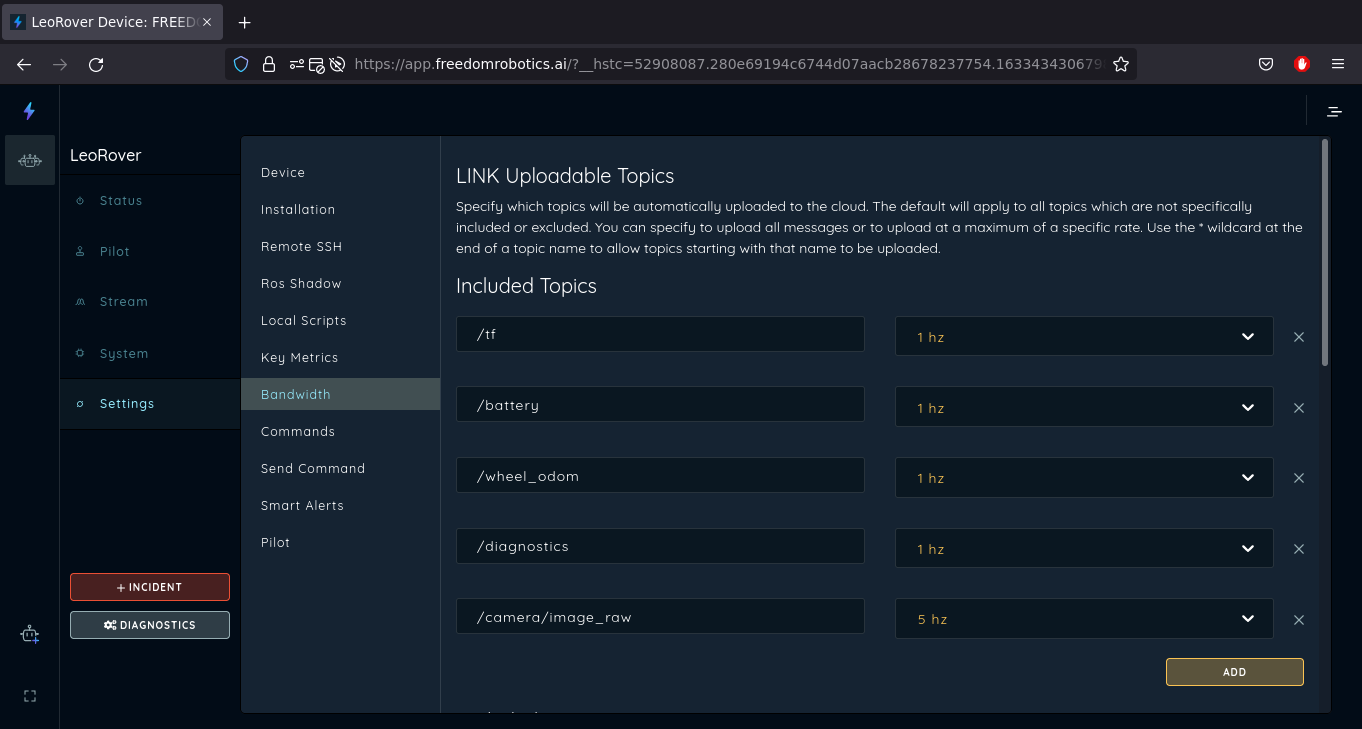
To use the basic functionality of the rover, you should include the topics below. These are the topics that will be listened to by the platform:
/cmd_vel is published by default so you don't need to add it.
You add the topic to the Bandwith by clicking Add in the Included Topics section.
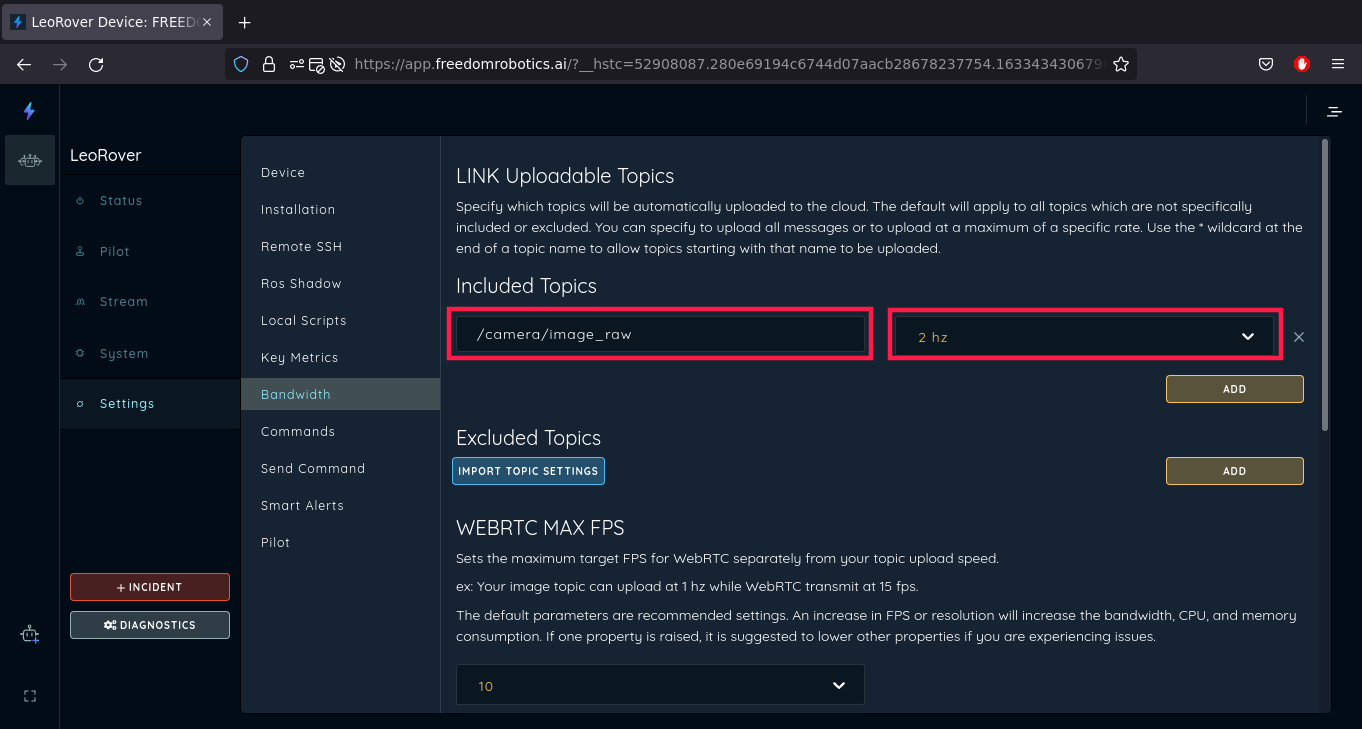
Then, you will have to enter the topic's name and choose the frequency of sending messages from this topic to the Freedom Robotics platform, from the drop-down list.
This is how our Included Topics look in the end.
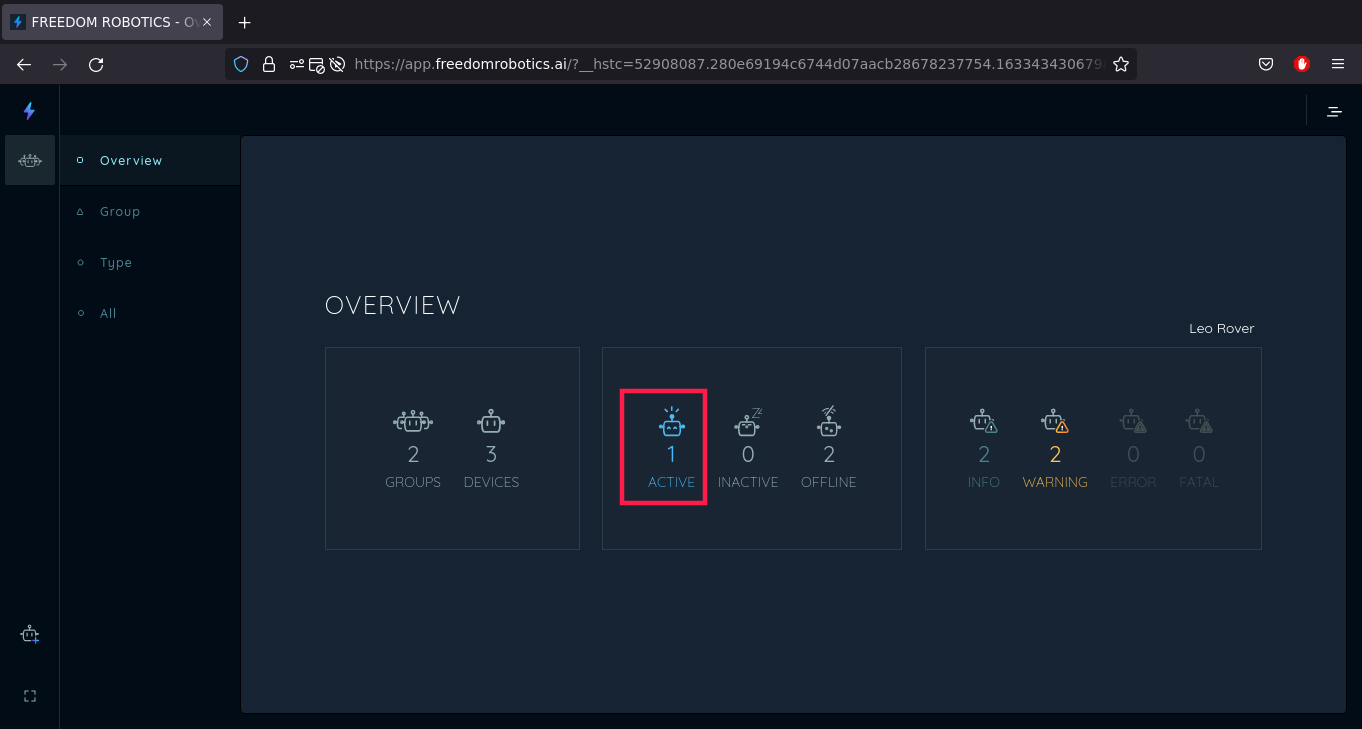
Now, if you go to the main menu, you will see that your device is active.
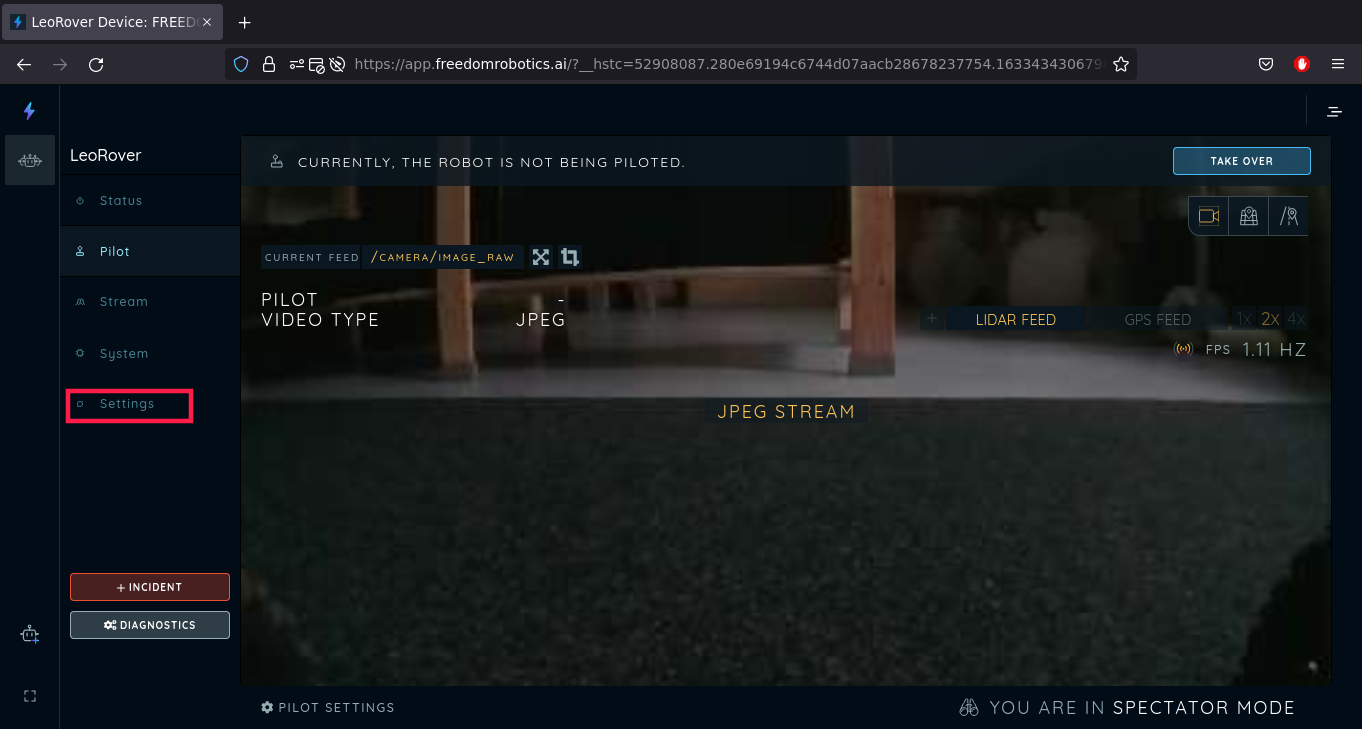
When you are in the robots settings, go to the PILOT section.
Now, modify /cmd_vel MAX ANGULAR VELOCITY to 60deg/s and MAX LINEAR VELOCITY to 0.5m/s – choose the right options from the drop-down lists. Those values are closer to the real speeds the rover can go.
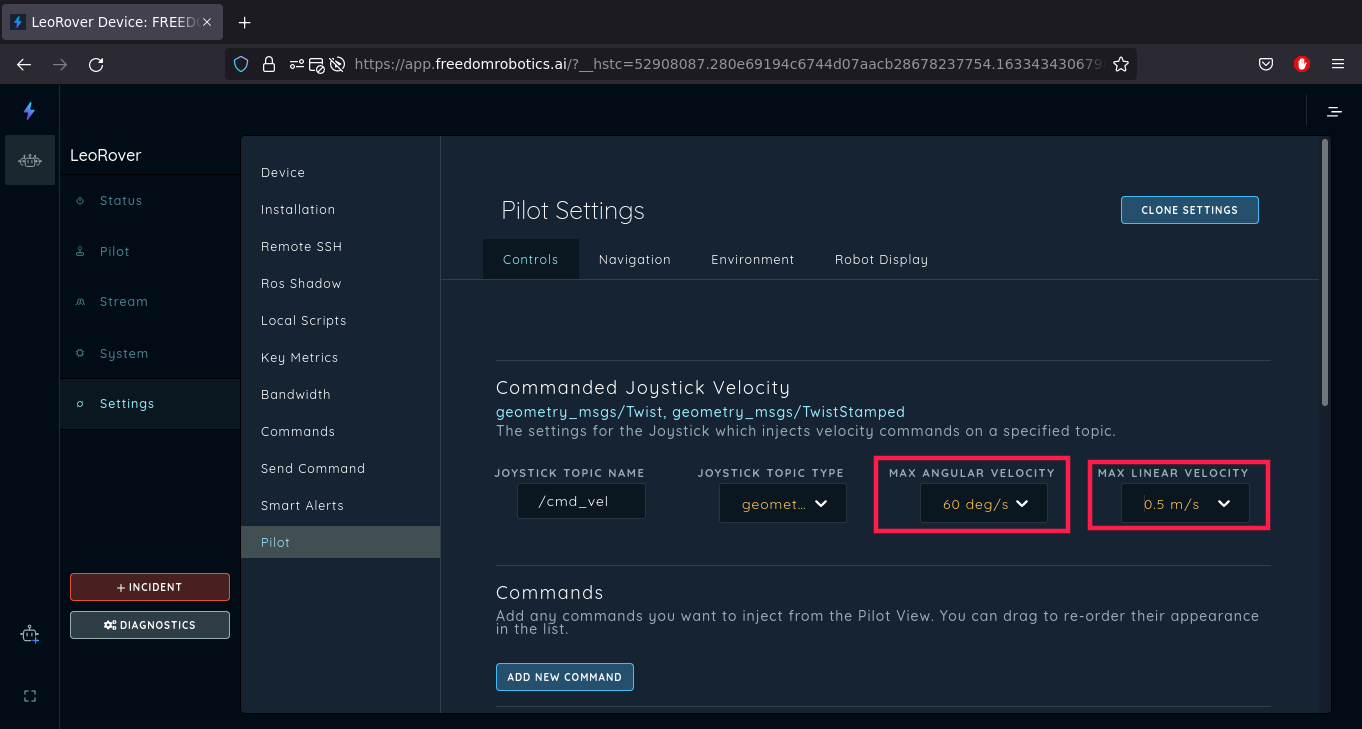
These parameters will modify the UI joystick scale to the proper realistic values.
Start by logging into your Freedom Robotics Account.
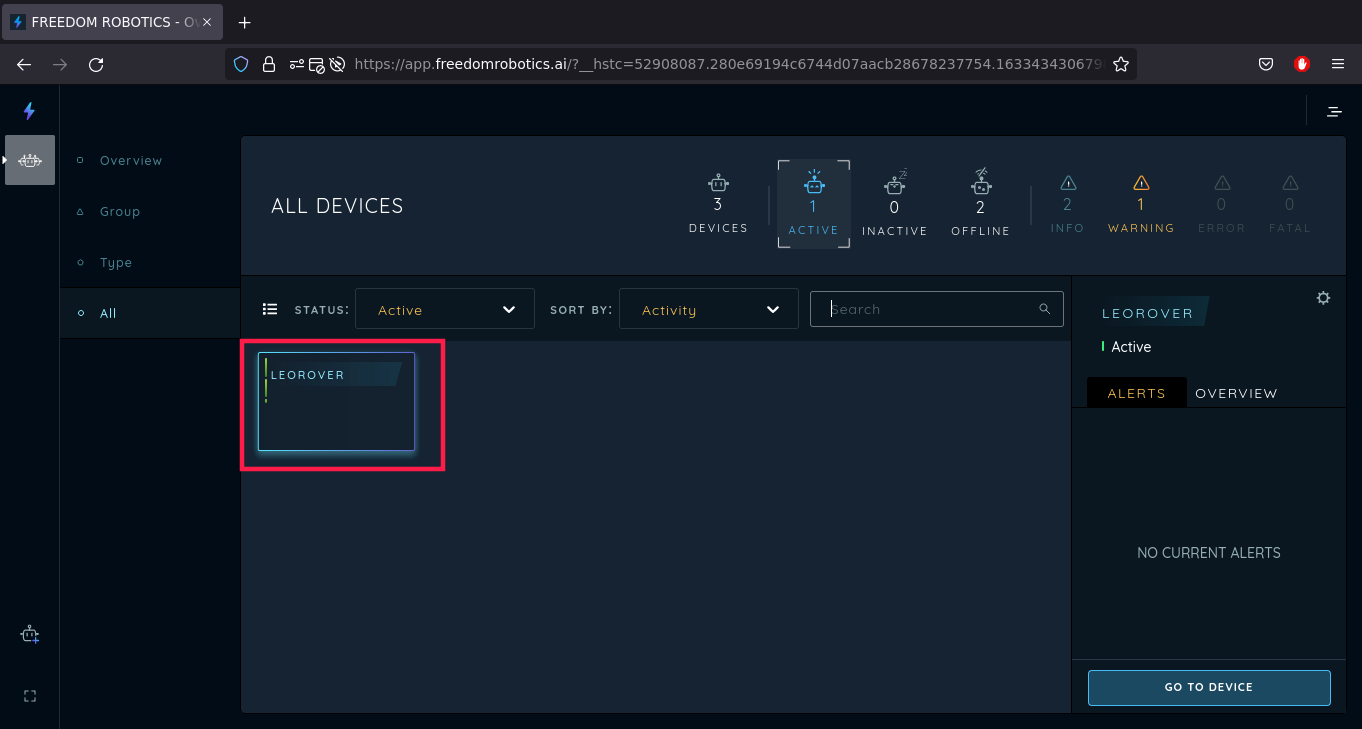
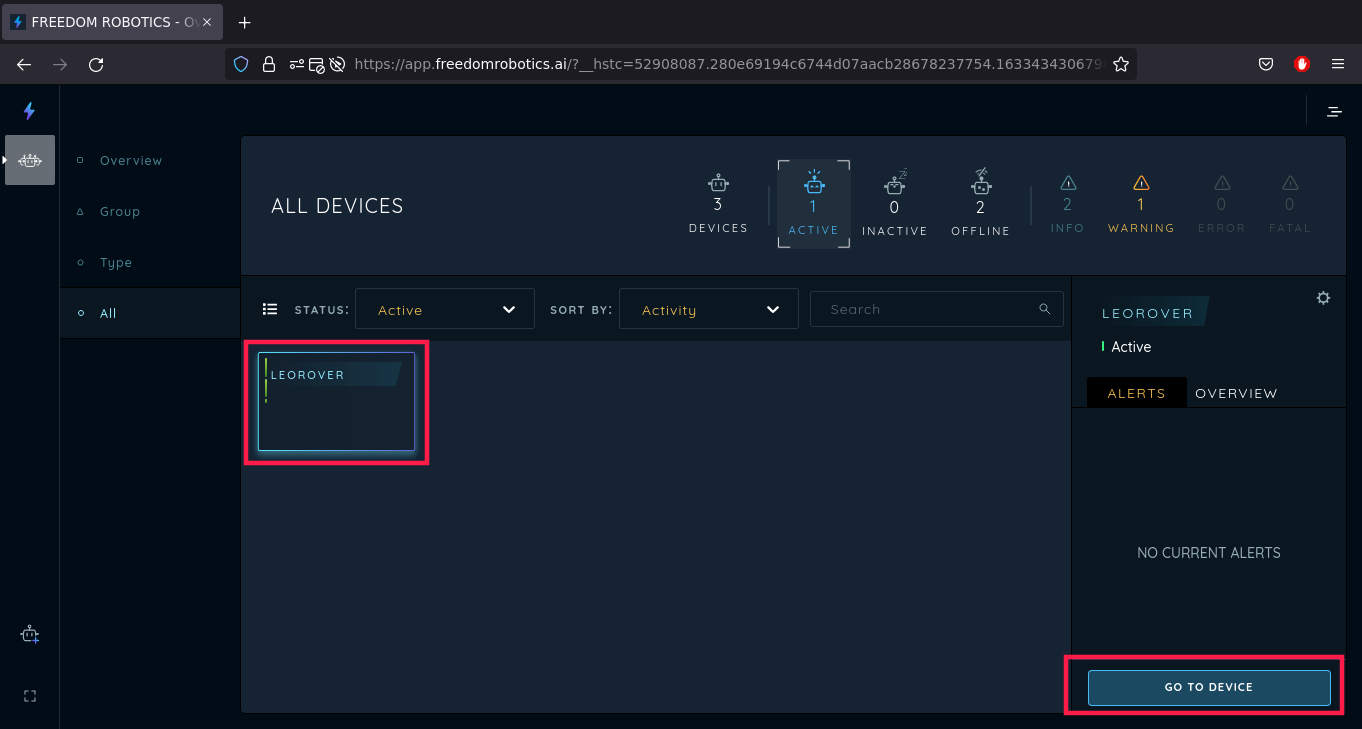
Then, in the overview panel, click the ACTIVE devices.
Now, you will see all the active devices. Choose a device that you want to connect to, and on the panel on the right click the GO TO DEVICE button.
Now you are in the Stream mode of the interface where you can see messages from the topics added in the Bandwidth section. You can play with the modes to learn how to navigate in the interface.
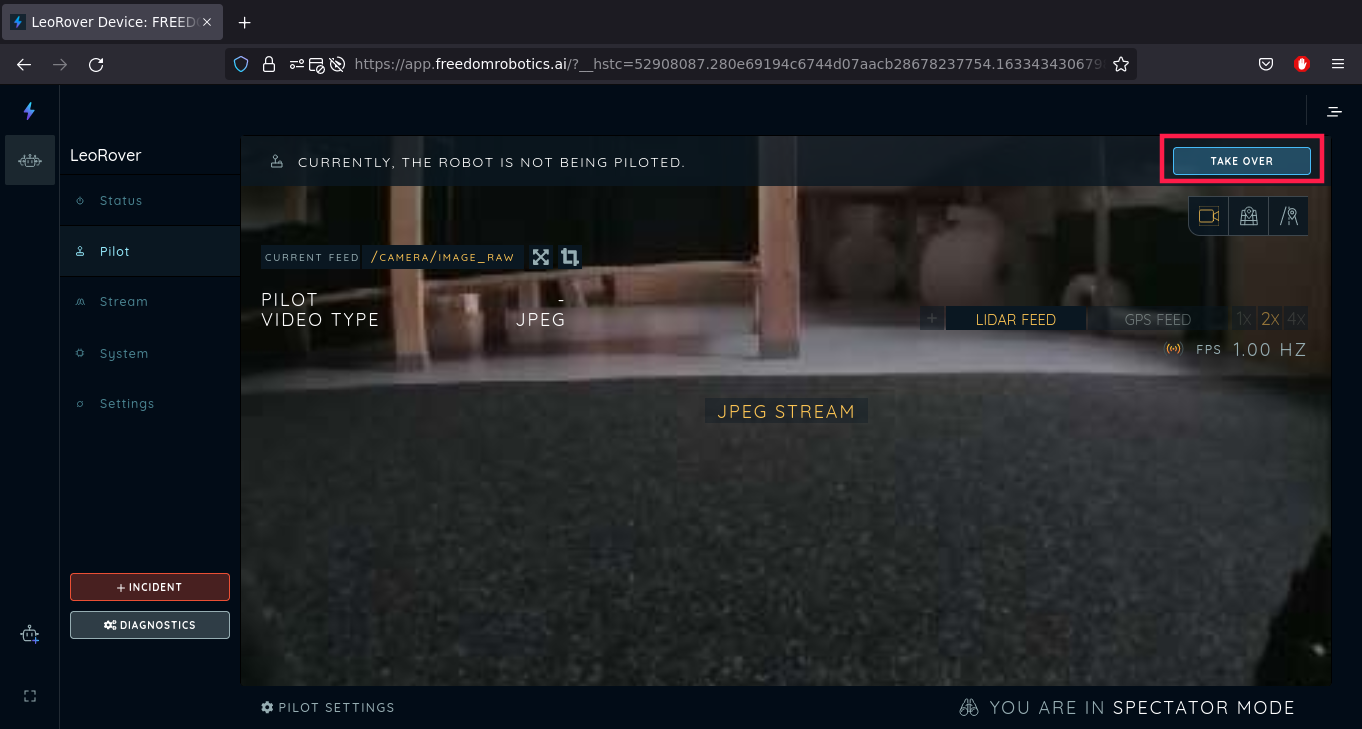
When connected to the device, go to the Pilot mode.

You should see a jpeg video stream in the background and UI features. Everyone who is logged to your account can see the same view as a spectator, but only one person can take over the control.
Click Take Over in the upper section of the video stream.
Wait a couple of seconds until the streaming method is changed from JPEG stream to WebRTC (you'll see that the notice in the image center changes).
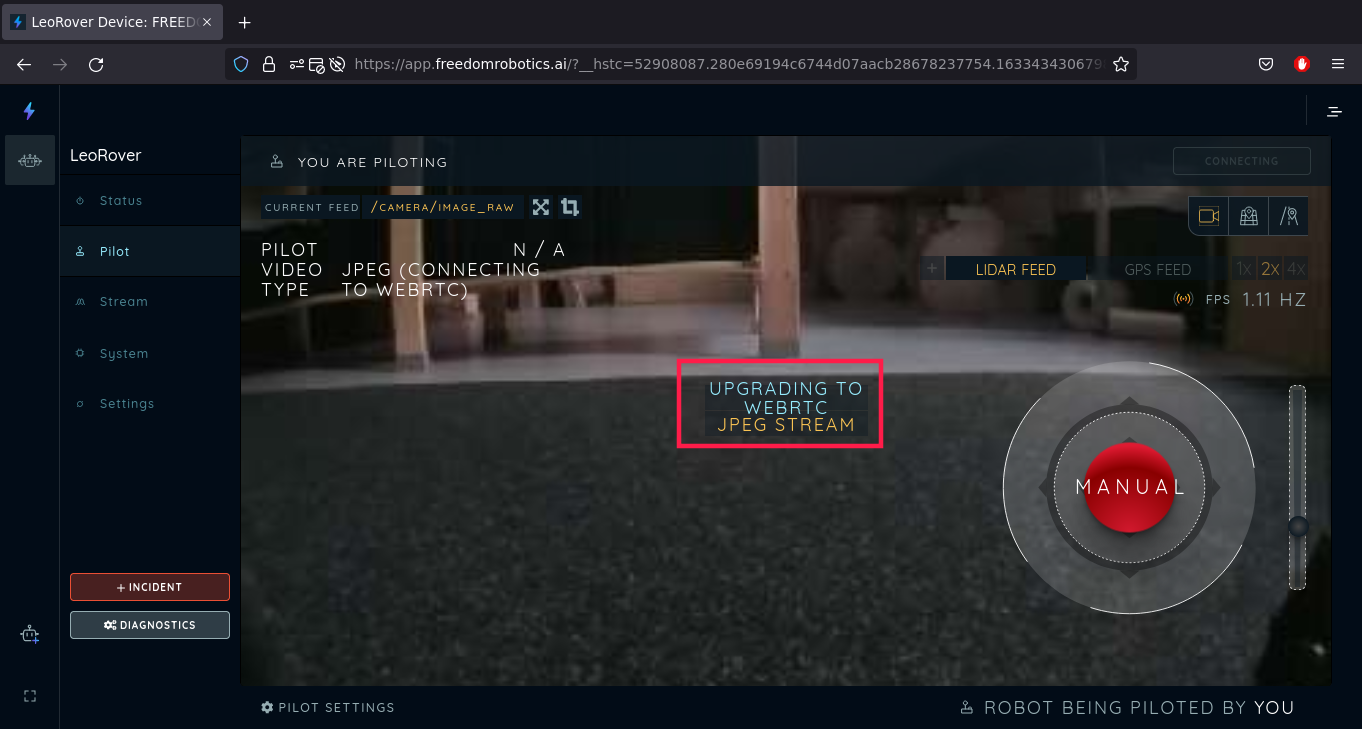
Now you're able to drive the rover with the red joystick. You can also change the speed with the slider on the right of the joystick.
Assemble the IMU module to your Rover and follow the IMU tutorial to enable IMU data streaming to the ROS environment.
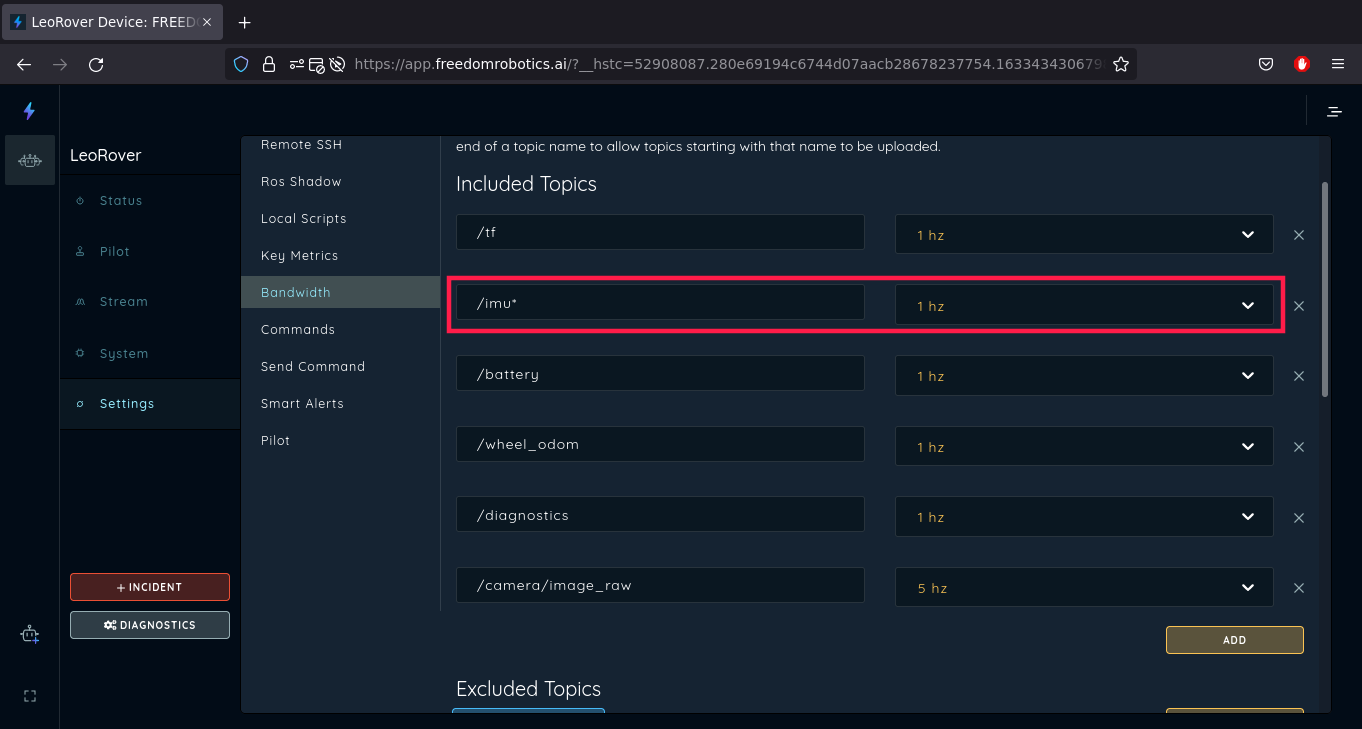
Now, connect to your device via Freedom Robotics and go to the device Settings and then go to the Bandwidth section.
Now, add a new topic to Included Topics.
Include /imu* topic – this will include all the topics from the imu sensor.
Now, in the Stream section you can see data from the IMU topics.

Our site provides developer resources, where You'll be able to check out more tutorials. Some of them (like line follower and object detection) do not use any additional equipment connected to the rover. Be sure to check them out.
Find us on:
