Home

>

Examples

Object detection

An object detection example for stock Leo Rover

Prerequisites

No items found.

Home

>

Examples

Object detection

An object detection example for stock Leo Rover

In this example, we will show you how to run Object Detection on the Leo Rover mobile robot.

What to expect?

After completing this tutorial, your rover should be able to recognize 91 objects from the COCO dataset (listed here), and display an image with drawn bounding boxes around the detected objects.

Prerequisites

No items found.

List of components

General requirements

  1. Basic knowledge about ROS (e.g how to run nodes, roslaunch and rosrun commands)
  2. Computer with Linux OS and ROS installed
  3. Stock Leo Rover

Mechanical integration

Wiring and electronics connection

Software integration

Since LeoOS 1.1.0 release, leo_examples package is installed by default. If the system is updated to at least 1.1.0 release you can skip software integration part.
To complete those steps, you need to connect to the rover's network first, and then log in using ssh (both covered in prerequisites).
One package in the leo_examples repository depends on ar_track_alvar package. As there is no release for the ROS version running on the rover (noetic) yet, you have to install it manually. To do so, type:

For the object detection, we use models prepared by TensorFlow and converted to TensorFlow Lite, so you need it on the rover too.

Installing using apt

You can install the package using apt by typing on the rover

Then you just need to source the ros workspace

Building from source

You can also get all the needed software from our leo_examples github repository. You need to clone it on the rover in the ros workspace directory (if there's no such a directory, then, first go through the ROS Development tutorial):

Now, you need to install all the dependencies for the downloaded packages:

Then, you need to source the directory and build the packages:

If your installation went without any errors, then you have successfully installed required software.

Examples

Using given models

Running the object detection node is very simple. First, you need to connect to the rover via ssh (tutorial in prerequisites). Once you are logged in to the rover, you can launch the node using roslaunch command:

The given launch file has a few arguments:

  • camera – the name of the topic with the Image messages (you can specify it if you have changed basic setup on the rover or maybe have two cameras)
  • labels – a path to the file with labels for the model (a parameter provided in case you want to try other neural network models that were trained on other datasets than COCO)
  • model – a path to neural network model for object detection (the models given by us are in the models directory of the leo_example_object_detection package)
  • config_file – a path to the yaml file with defined colors for given labels.
  • Every argument has default value, so when launching the node, you don't need to specify any of them. They are for your use, if you want to change the default functionality
  • You can create your own config_file, the file needs to have two ros parameters labels and colors. The first parameters is a list of strings, where each string is a label from the dataset, that was used for training the model. The second parameter is a list of lists, where each list has three numbers (color in rgb format). This way first label from the labels list will be in the first color from colors list, second label in the second color and so on. (You can always look for the label_colors.yaml file in the config directory, to see the correct fromat of the file). For each label, that is not defined in this file, there is a default color, so you don't need to define all the labels

So, with some arguments your line can look like this:

Now, you need to display the output of the model. As the connection via ssh doesn't allow you to run GUI the applications (unless you run ssh with -X flag), you will need to allow your computer to run ROS nodes with master being on the rover. To do so, you need to go to ROS workspace on your computer, source the workspace, and export some ROS environment variables:

You can check if you did everything right by typing on your computer rostopic list. If you will see list of topics from the rover, then it means, that everything is ok, and you can continue.

Once you have done this, you can run rqt on your computer:

There, you need to run two things:

  • Image View (Plugins -> Visualization -> Image View)
  • Dynamic Reconfigure (Plugins -> Configuration -> Dynamic Reconfigure)

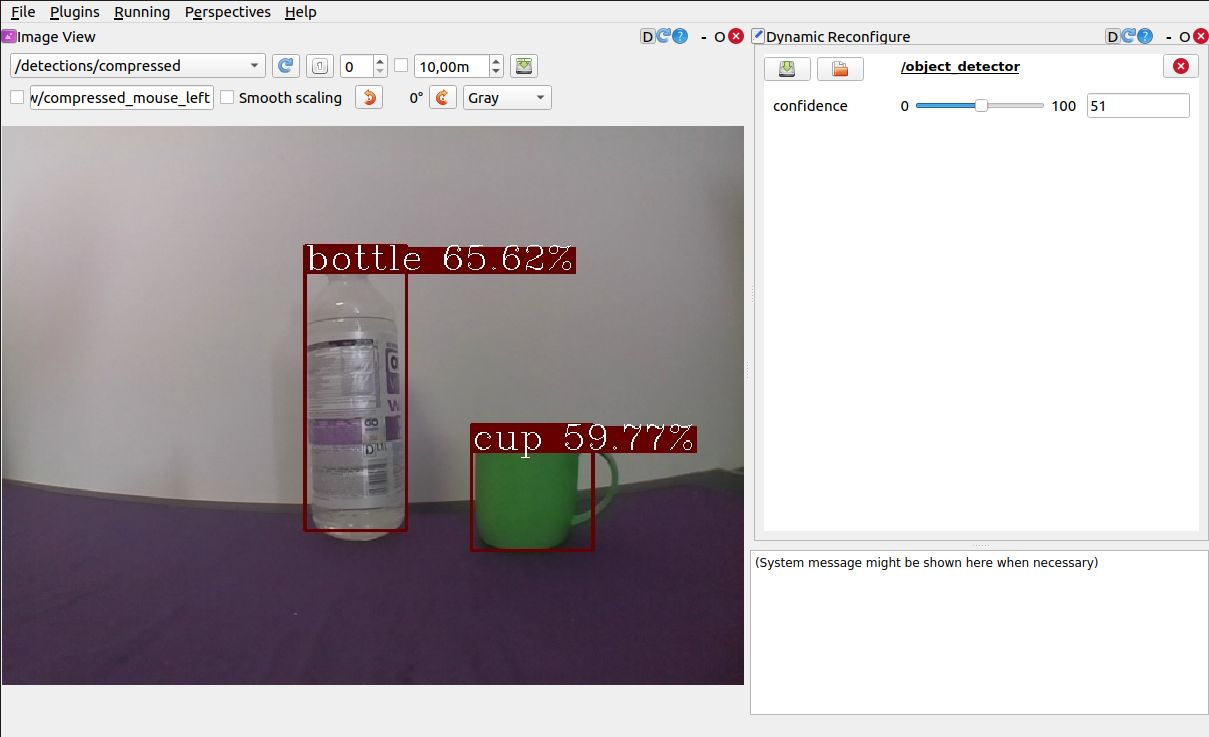
In Image View, from the topic drop down choose /detections/compressed – this is the processed image with drawn detections on it.

In Dynamic Reconfigure, choose object_detector. You should see something like this:

rqt setup for object detection with leo rover

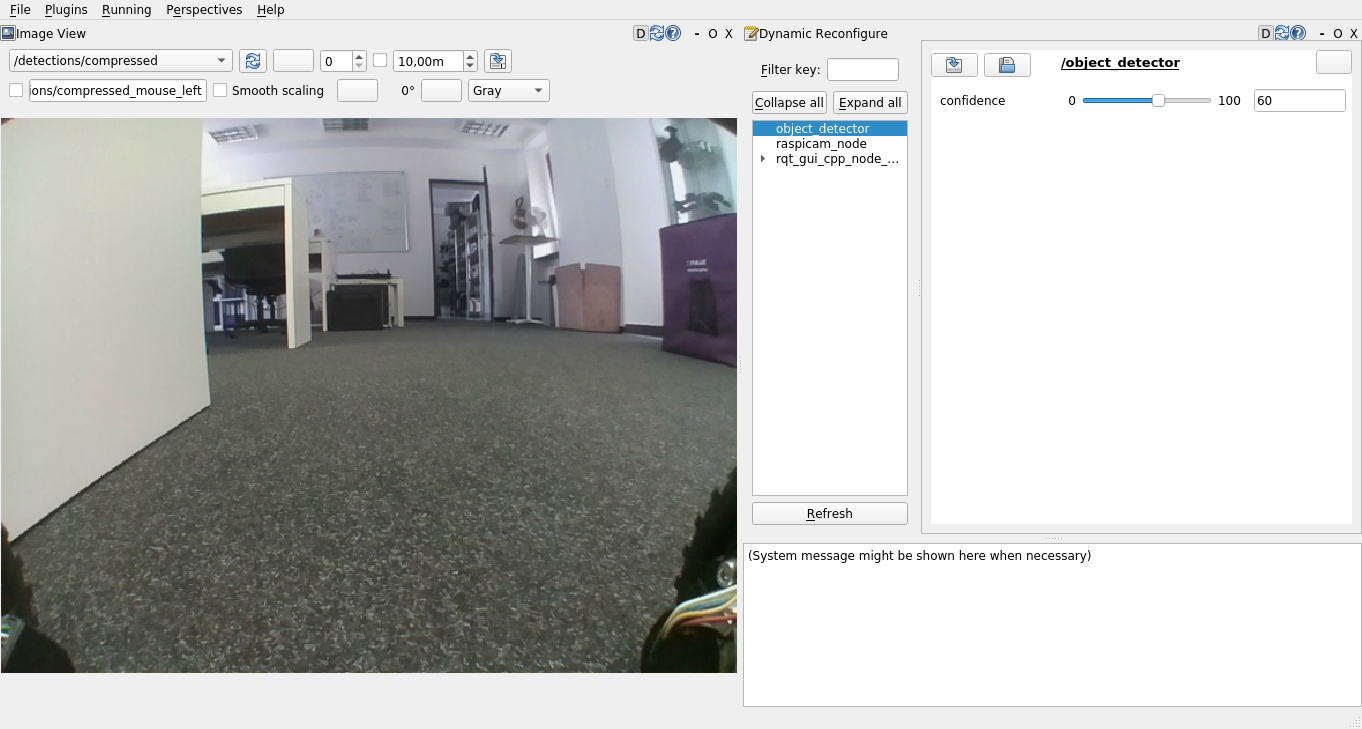
On the right side (in Dynamic Reconfigure), you can see a slider. It's a slider for the confidence parameter – it specifies the confidence threshold for the neural network guesses (only the detections with confidence higher than the specified will be drawn). You can change the value to see how the detections change.

Place objects inside the view of the camera and if they are a part of the dataset, and the algorithm if confident enough that they are what they appear to be what they really are, boxes around the item, and a text description will appear.

Adding models of your choice

It's possible to run the node with your models (either made from scratch or found on the internet). To launch the node with your files, you have the launch arguments (explained above). You can specify their values to make the node use your files.

If you provide model, that was trained on other dataset than COCO, then you will need to give the node labels for your model too.
Not every object detection model will be compatible with our node. The models that we have provided in the models directory of the package, are pretrained, single-shot detector models, converted to TensorFlow Lite from the TensorFlow repository.
So if you want the model of your choice to be compatible with our node, the model needs to follow such output signature.

What next?

After completing this tutorial, you can try other examples from the leo_examples repository (line follower and follow ARTag), or try other integration from our site.

Contents

Need help? Contact us - contact@fictionlab.pl